Vintage 1946 Sonora AM Radio Restoration – 15 – The Audio switching Circuit & Powering the Arduino
Vintage 1946 SONORA AM RADIO RESTO-MOD PROJECT
The Audio switching Circuit & powering the Arduino:
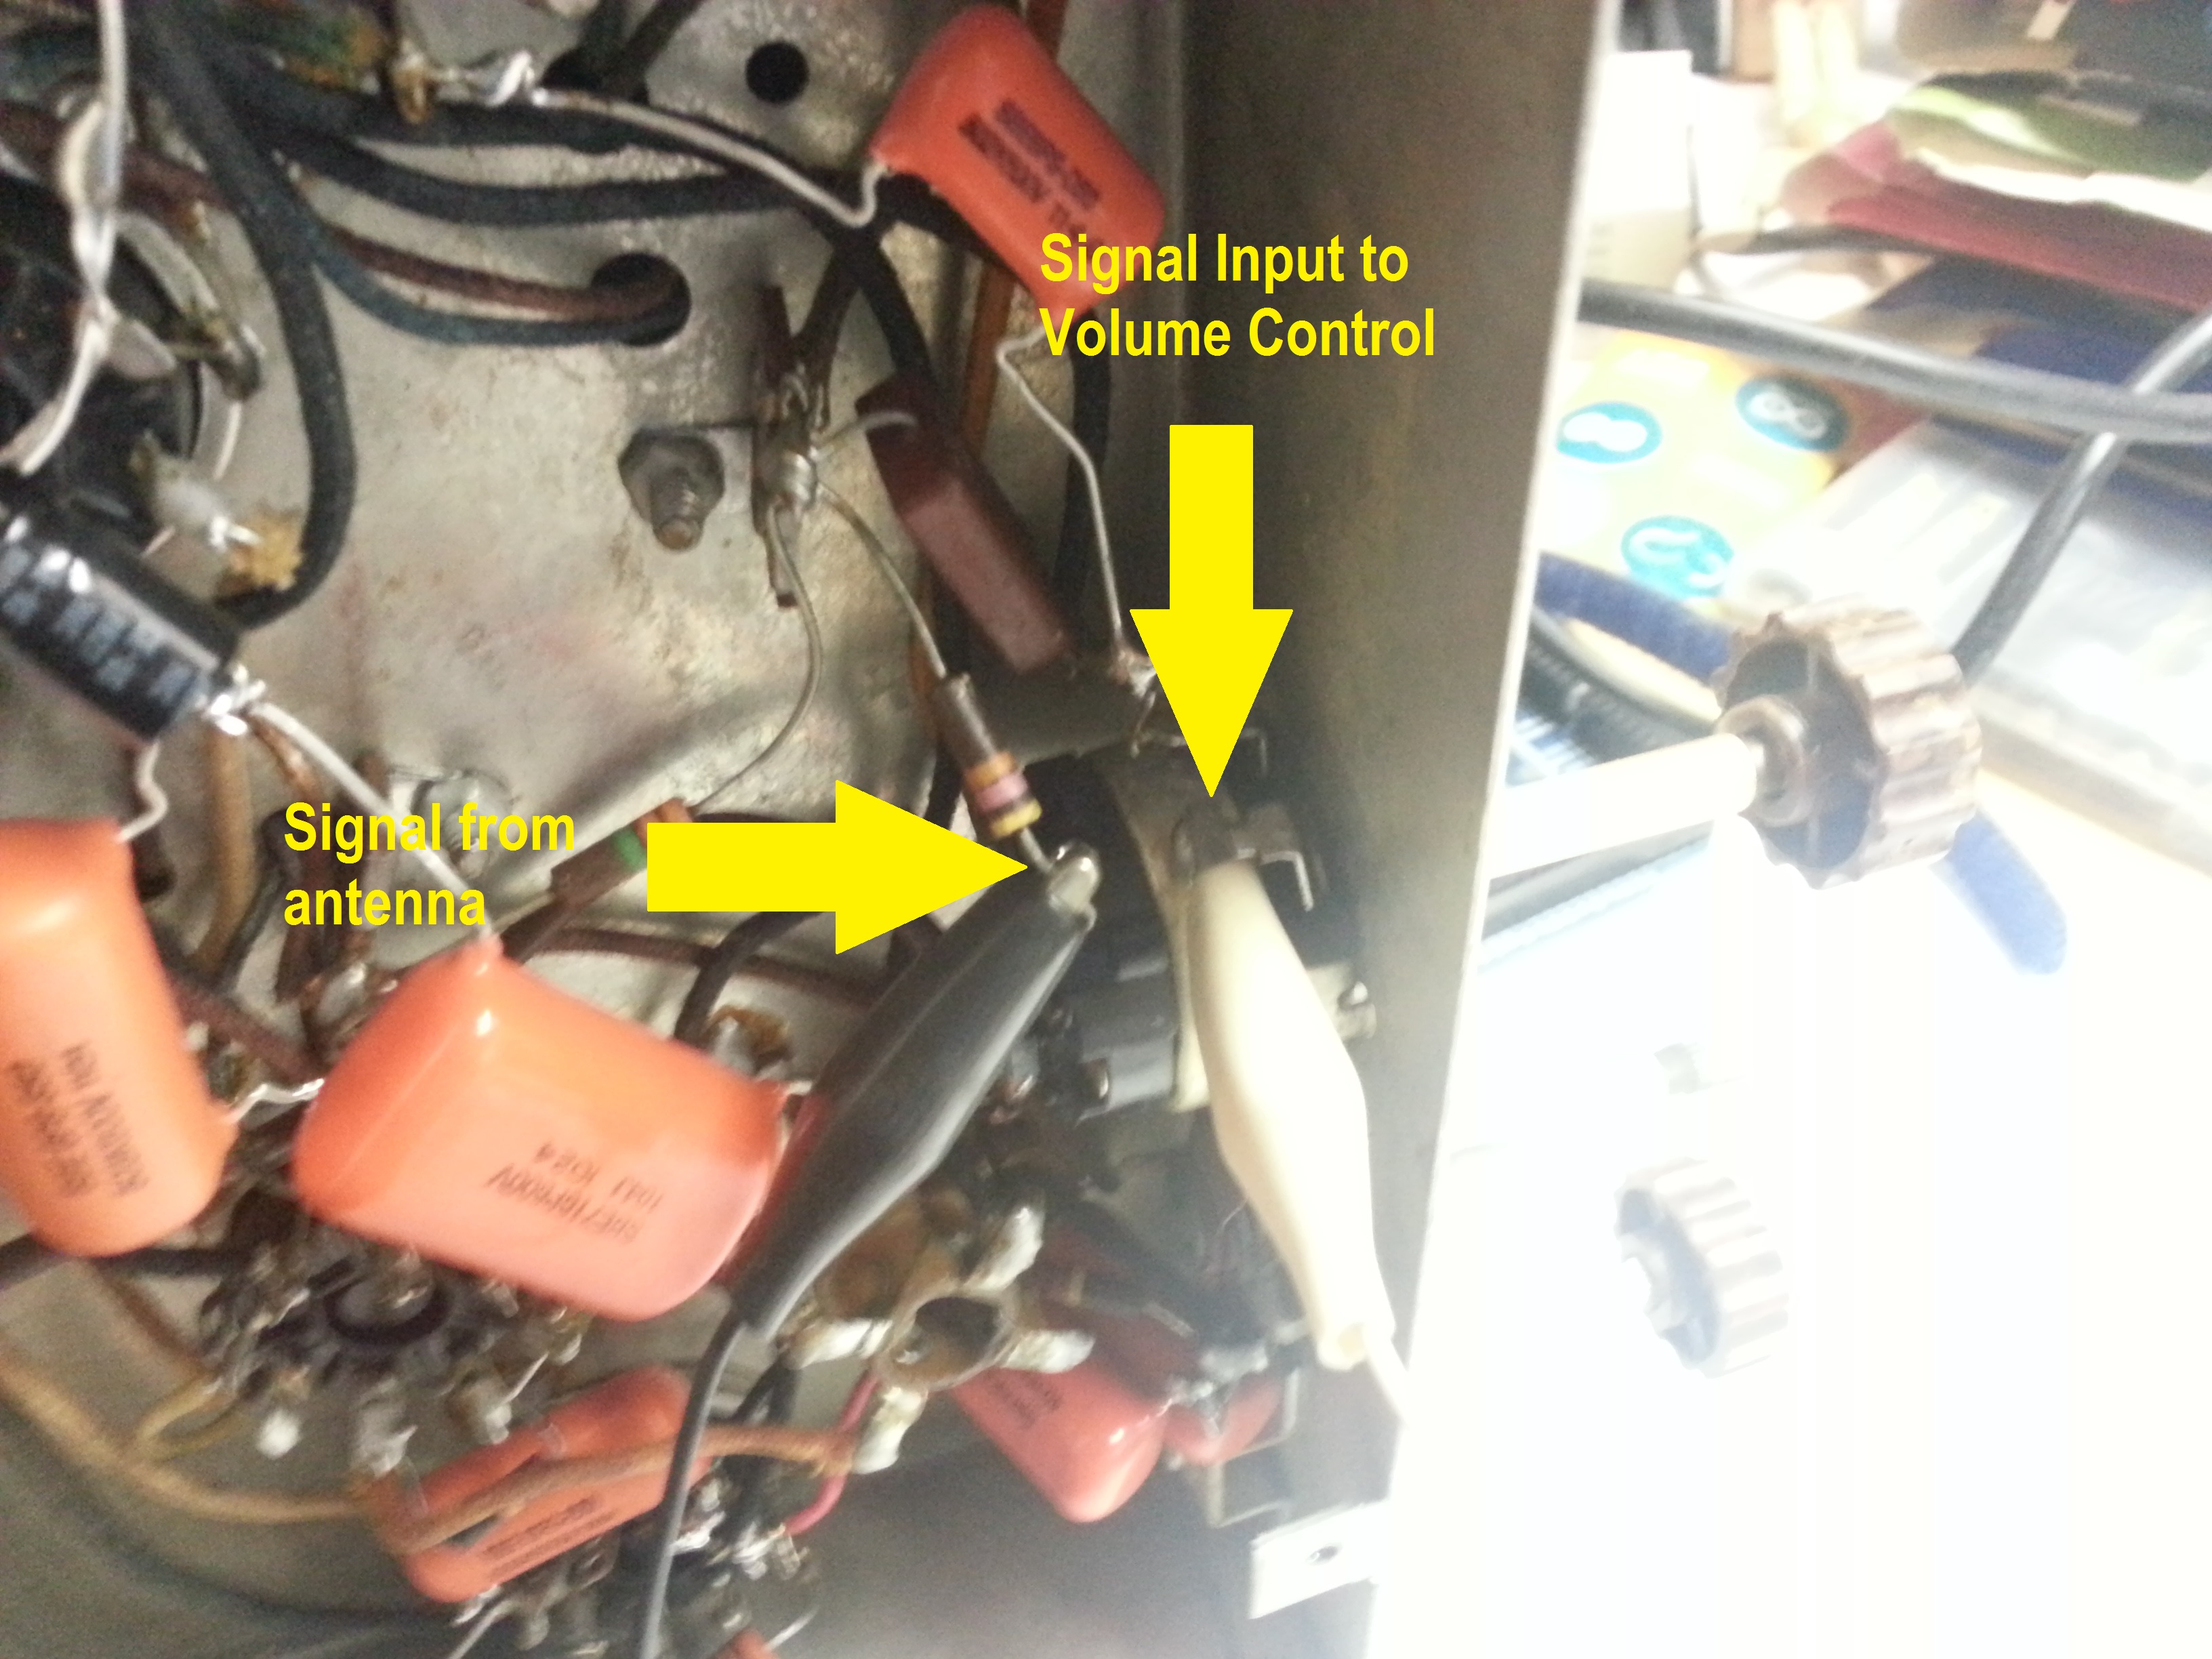
The circuit that handles the switching for audio between the MP3 Player and the Radio Antenna is a fairly simple one. I used a small audio transformer to make sure the MP3 Player was isolated electronically from the radio circuitry. From there, I used a simple relay switching circuit to select the input from the radio antenna (default) to the MP3 Player. The input of these is connected directly to the volume control in the radio so that the volume can be adjusted for either signal. It took a bit of time studying the schematic and comparing to the actual components in the radio to make sure I had the correct connection on the volume control.
Once I had the connection identified, I cut the input to the volume control from the antenna and did a bit of testing to make sure it was the proper connection. I tested the MP3 output connected to this (through the audio transformer) and also reconnected the severed connection to make sure the antenna connection would still work. Once all of that was verified, it was a matter of designing the circuit and creating it on a prototype PC board.
The circuit design is shown below.

I also had to come up with a way to supply power to the Arduino board / MP3 Player Shield. An Arduino will take a 7 to 12 volt DC input into the power port. This voltage then goes through an on-board voltage regulator to take it to 5 volts. But… Regulated 5 volts can be applied directly to the 5 volt pin on the Arduino as well! I had a small 1 Amp USB phone charger laying around that was not being used so I dismantled it, connected it to the power of the radio power cord (after the on/off switch), and connected the output of it to the 5 volt and Ground Pins on the Arduino. The power supply and Arduino is now turned on when the power to the radio is turned on!
Here is a shot of where I tied into the radio to get the antenna signal and return the input signal to the volume control potentiometer.
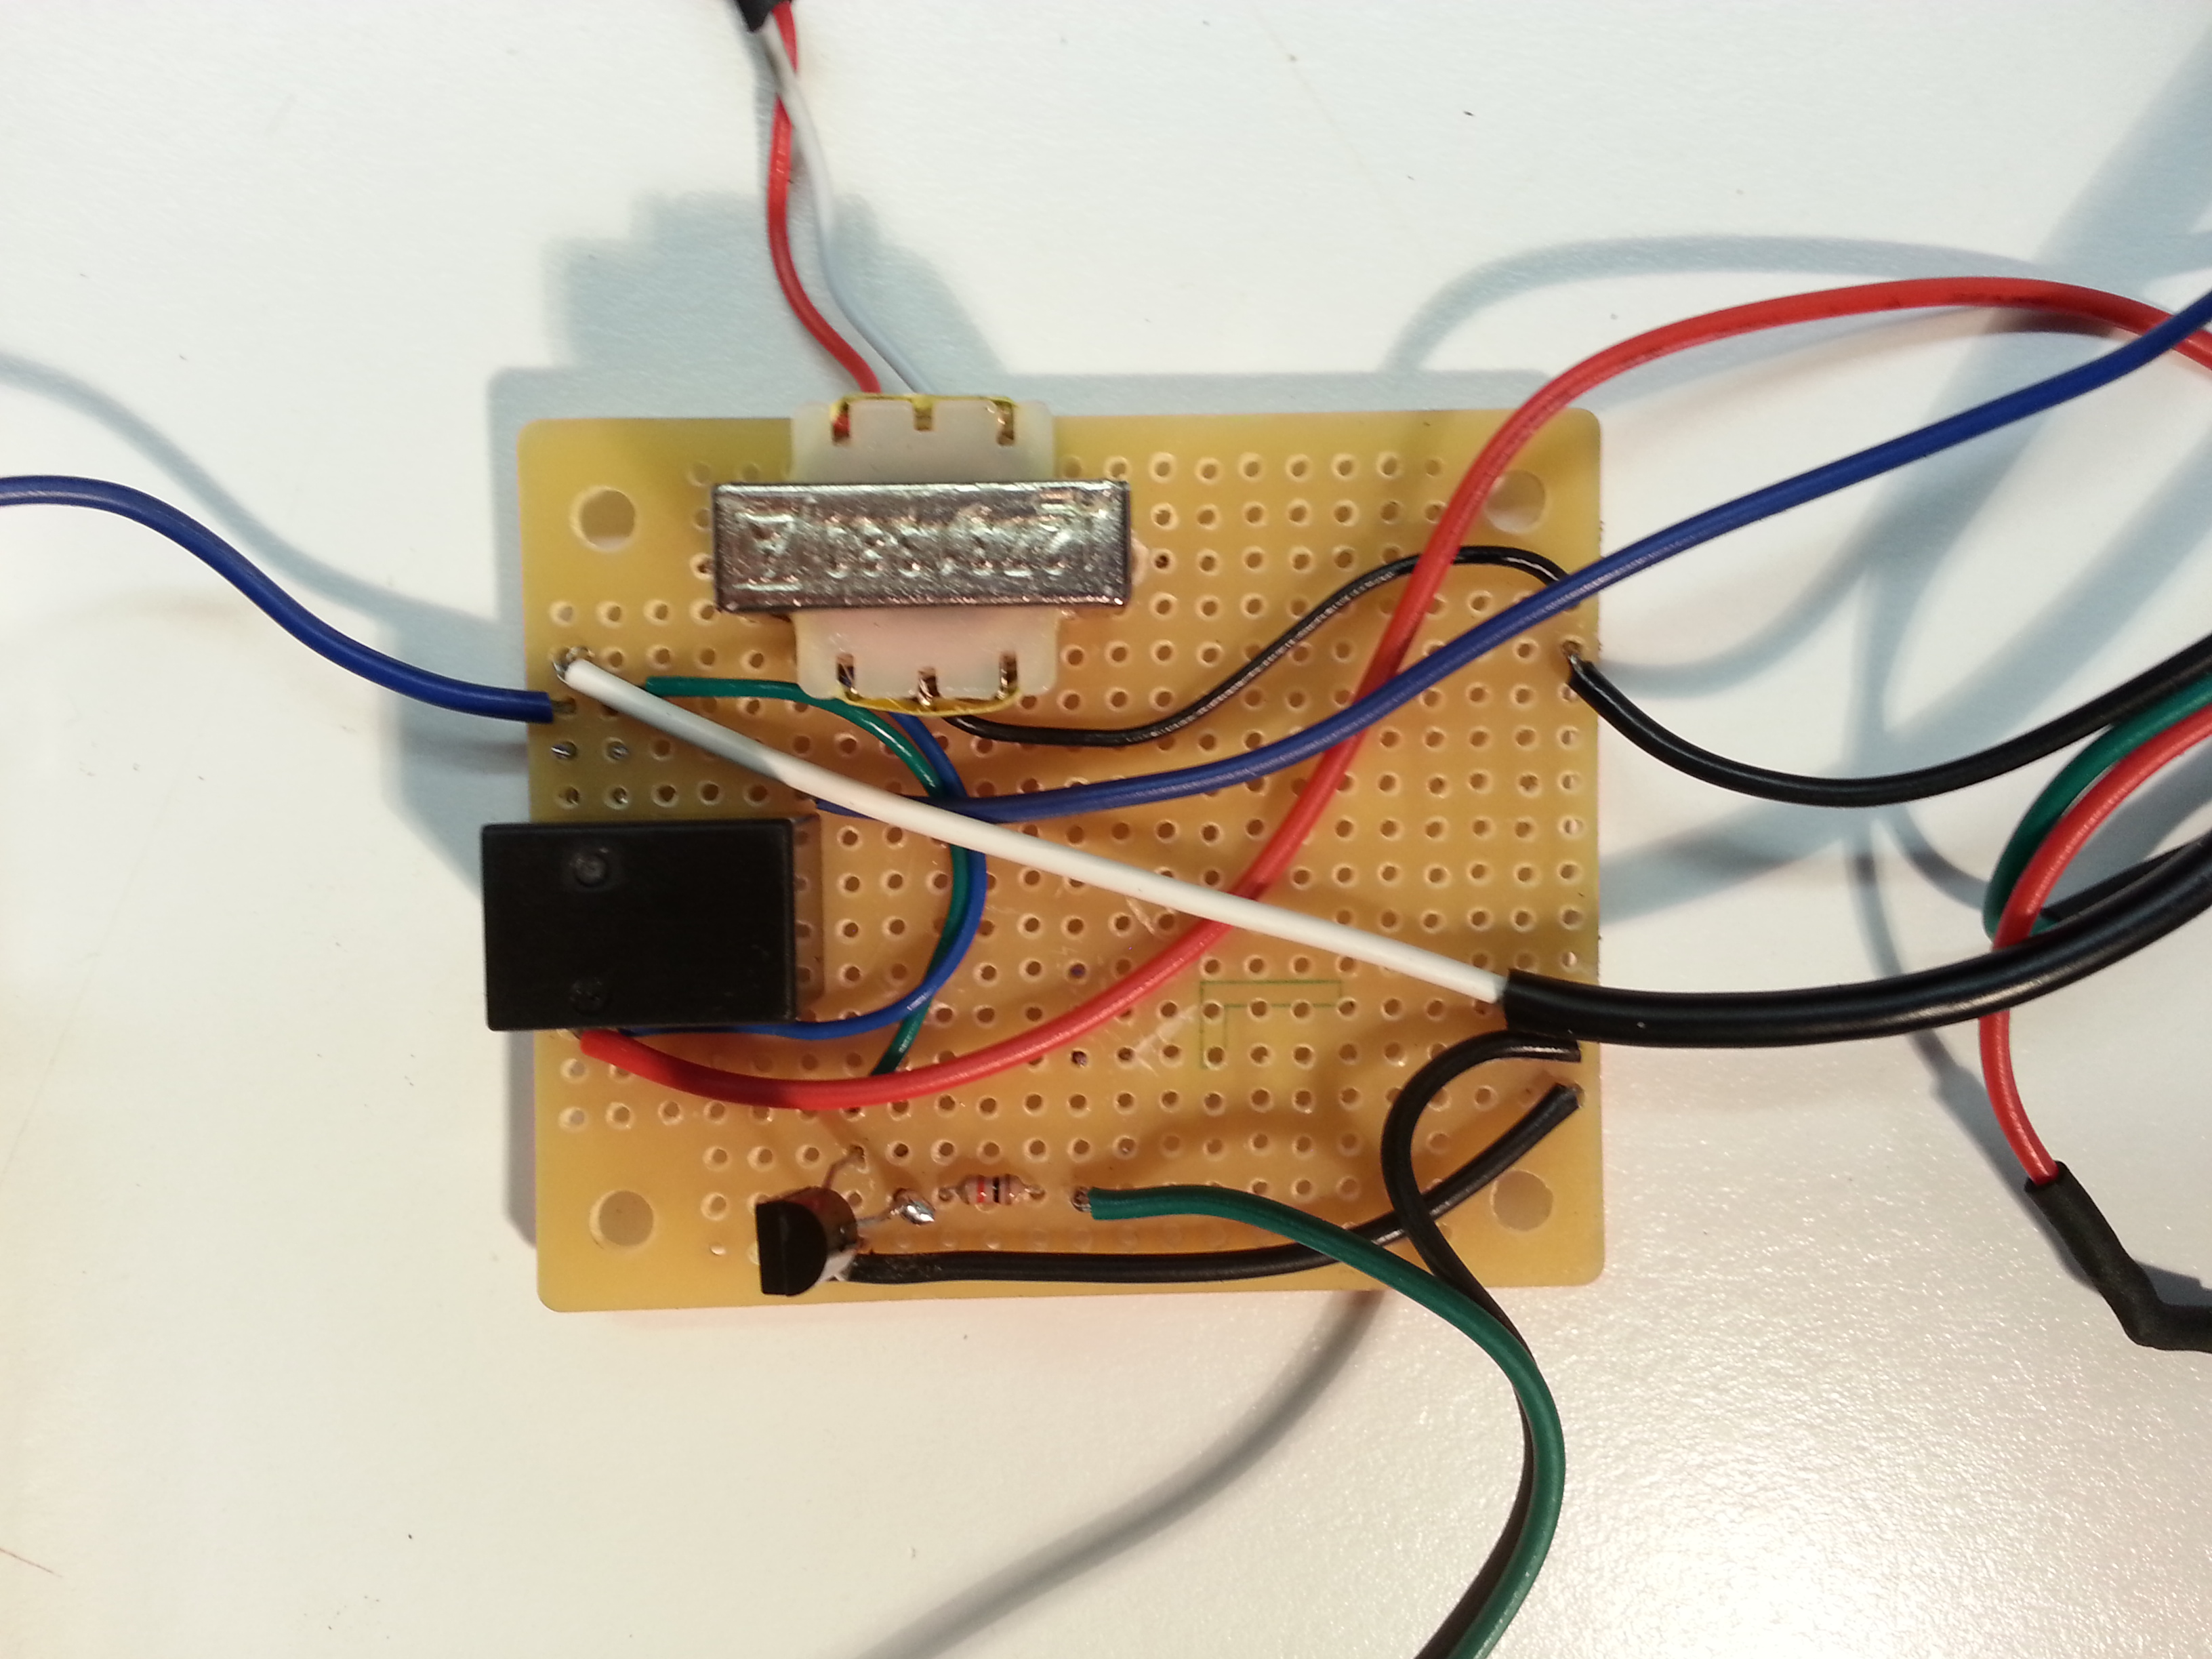
And here is a shot of the Audio switching board
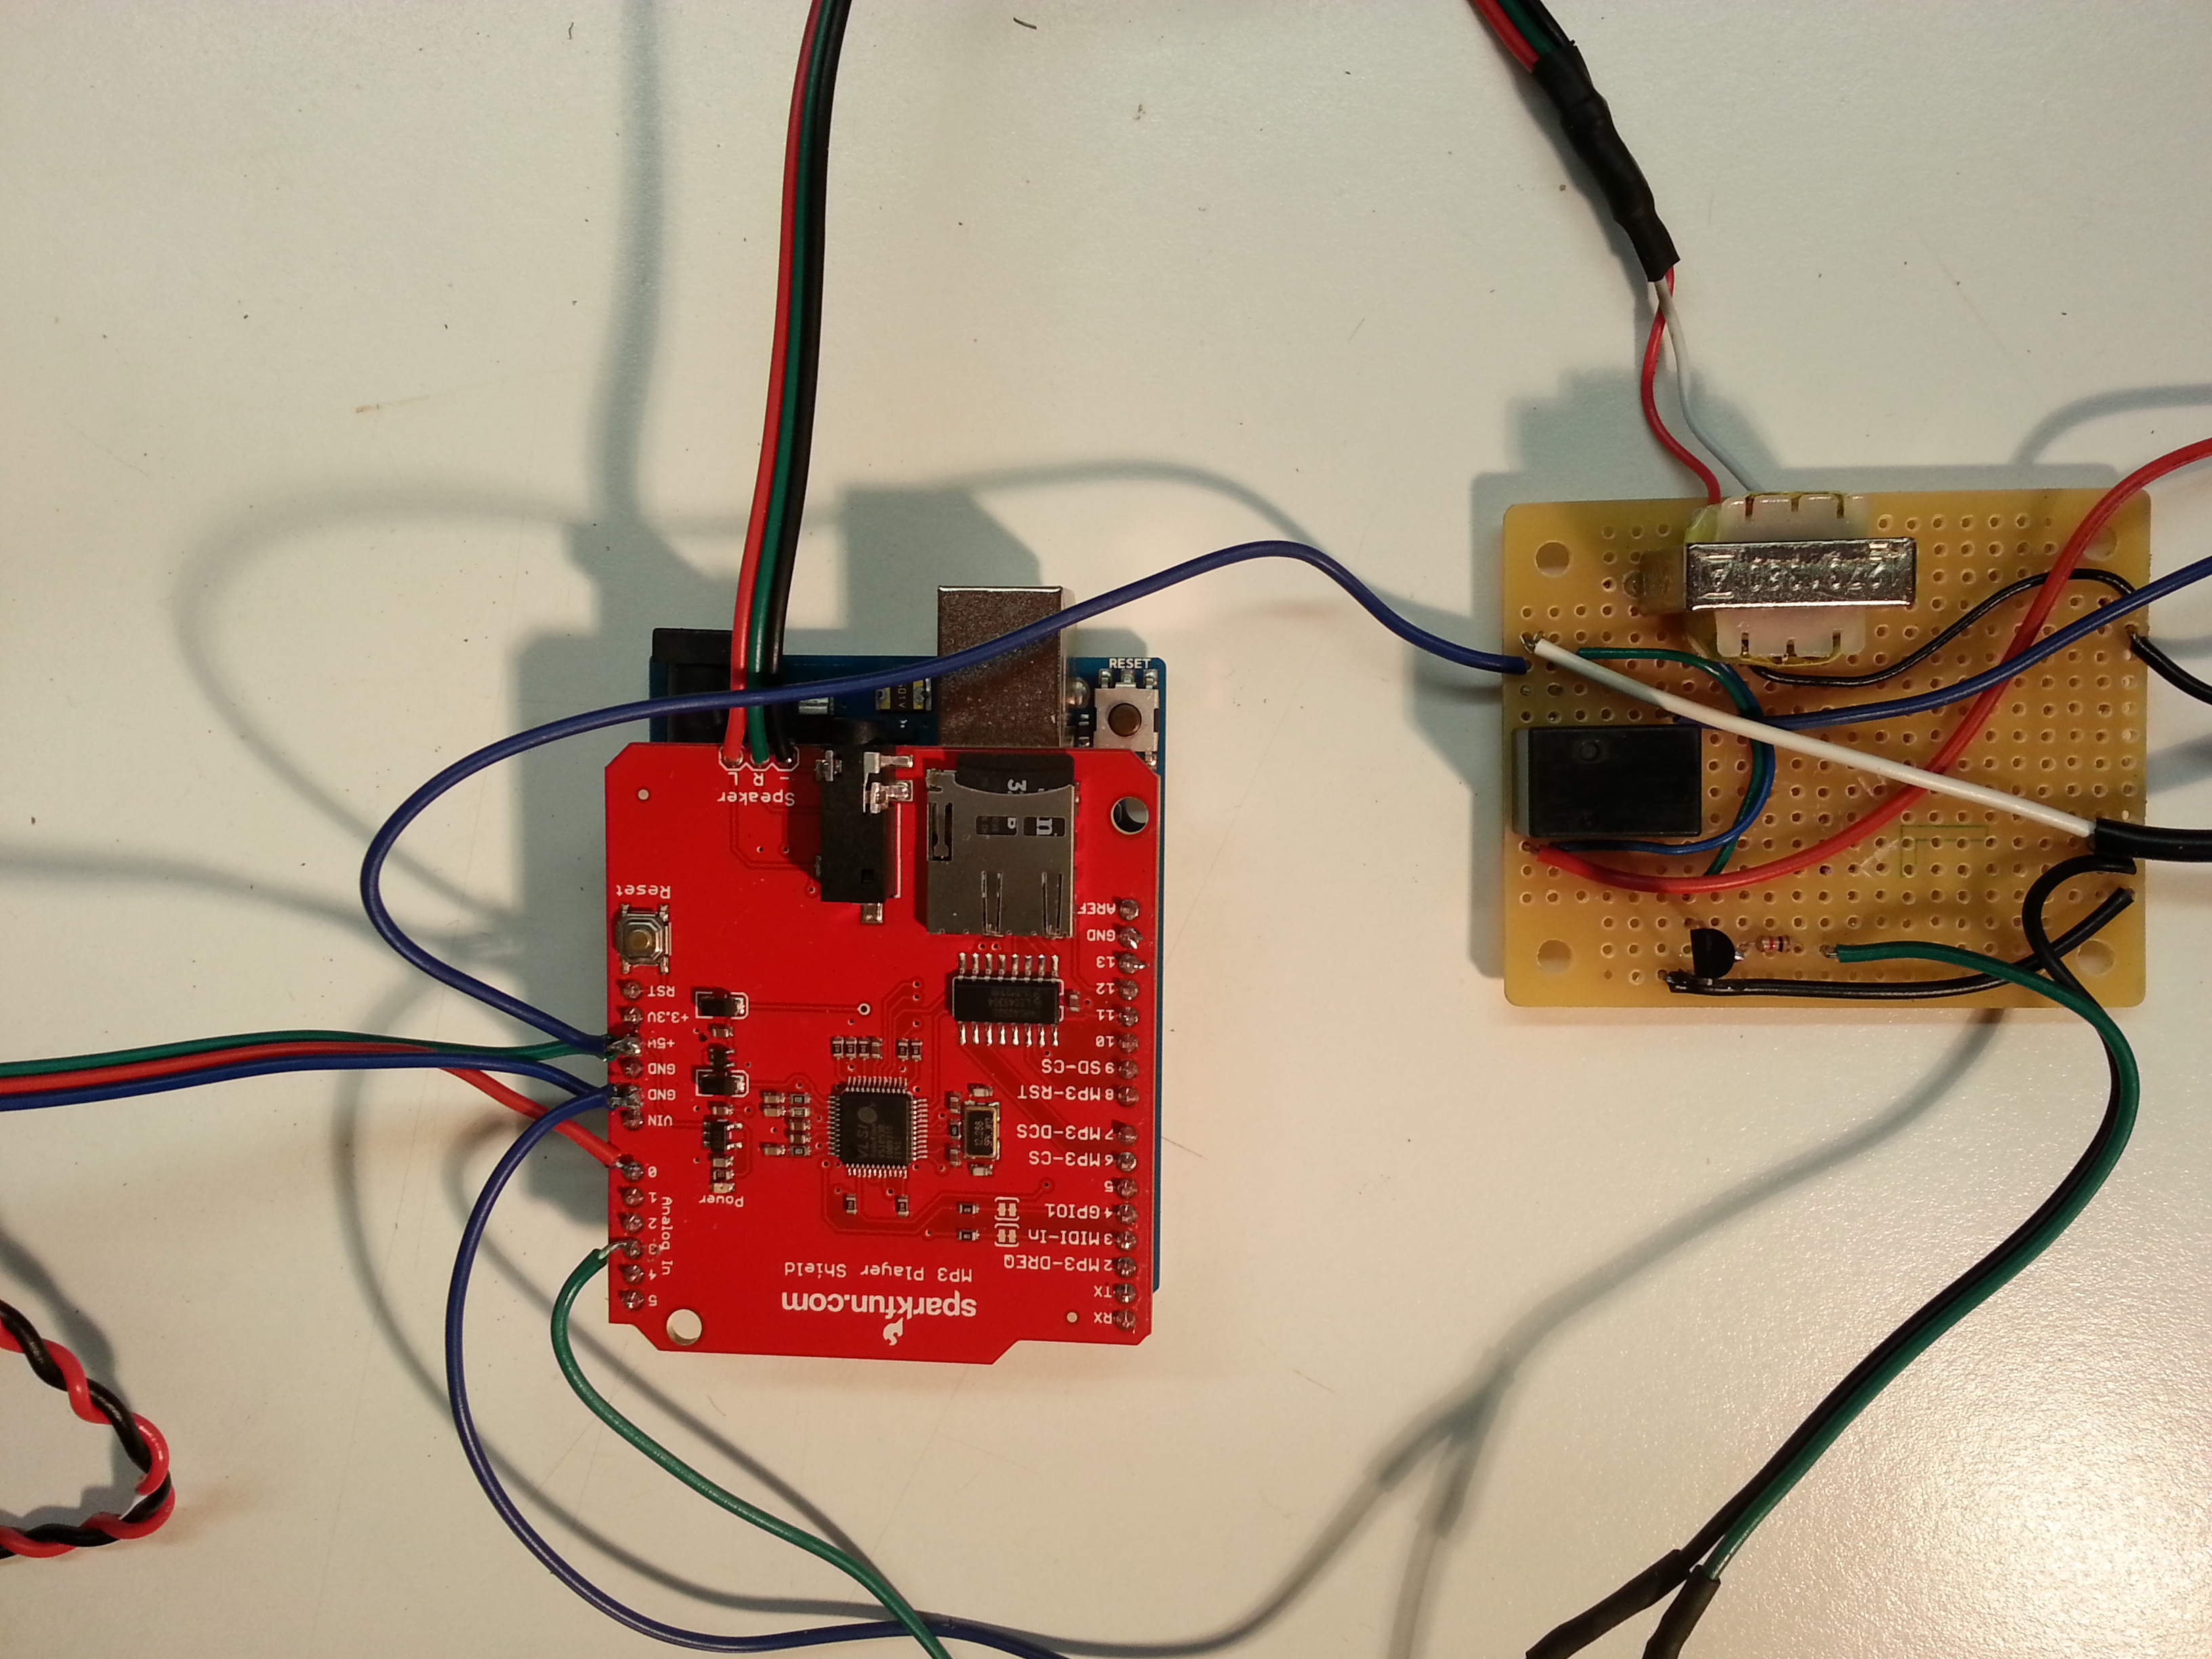
Here is a shot of the Arduino, the MP3 Shield, and the Audio Switching board
Here is a video of it working with some test MP3’s loaded to the player
Forward to Page 16
Back to Page 14
Back to the Table of Contents

Leave a Reply
You must be logged in to post a comment.