Vintage 1946 Sonora AM Radio Restoration – 03 – General Condition
Vintage 1946 SONORA AM RADIO RESTO-MOD PROJECT
Assessing the General Condition of the Radio:
The first thing I did before doing anything to the radio itself was do some research on the internet to see what I could find out about this particular radio. I was lucky in the fact that there were still some labels on the bottom of the radio that identified the manufacturer (Sonora) and also the Model number of the unit (RCU-208). This information was enough to get me to some pictures of what the radio was suppose to look like. I was also able to find a good schematic for the radio even though there was one that was in good condition and readable on the bottom of the radio as well. Google is your friend! 😉 I will be compiling a list of resources that I found on the Internet to help guide you through something like this. But there will be some things that I am doing that, as far as I can tell, have not been done by anyone else, I will be providing details of those areas in case anyone wants to attempt to add the extra bells and whistles to their own project.
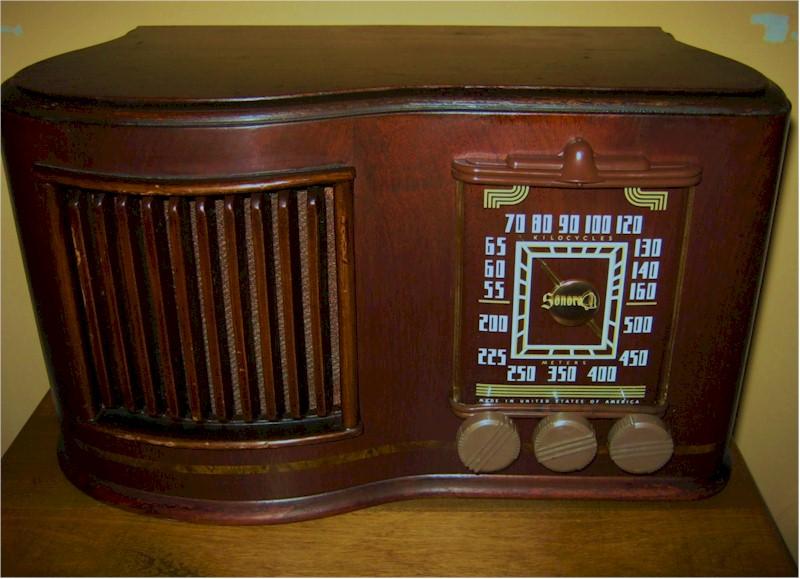
Once I knew what the radio was supposed to look like, I started looking it over to see what was missing. And unfortunately, there were a few very key pieces missing on the outside of the radio. First of all, the Dial Scale was missing from the front of the radio as well as the framework that held the dial scale in place. I also noticed that there was no light bulb or socket in the hole where the dial light went. The dial pointers were also broken off the center hub. But other than that, the rest of it seemed to be there and was in great shape! All three original knobs were still there, and the fabric covering the speaker looked like it was in good shape too minus a small hole in it. The wood cabinet was in extremely nice shape and had no dents or scratches. (My Grandpa was a woodworker and it doesn’t surprise me at all that he would choose a nice looking wood cabinet in a radio!) There was just a lot of dust everywhere really but the cabinet could still use stripping and refinishing though. Mainly just to bring it back fully to its original glory! 🙂
Okay, time to start disassembling the radio! I got a zip-lock baggie out so that I could place the parts in it for safe keeping and started removing the knobs and dial pointer. Then I removed the screws that allowed me to remove the chassis from the cabinet. As I pulled the chassis out, I noticed that all of the tubes where still installed and in their proper place and there was a layer of dust covering everything! The cord that was used to turn the dial was broken but it was still in place. The power cord was old and stiff, but it was still in usable condition with no bare wires or shock hazards.
In looking at the bottom side, all of the electronic components were there and I didn’t see anything that looked like it had been burnt or charred. Some very old resistors and capacitors (condensers they called them then) were utilized and of course it was all point to point circuit wiring. Printed circuit boards were not in use then for things like this. But… it looked like everything was there and going through a restoration to get it working again should be fairly easy.
Here is what the radio looked like when it was new:
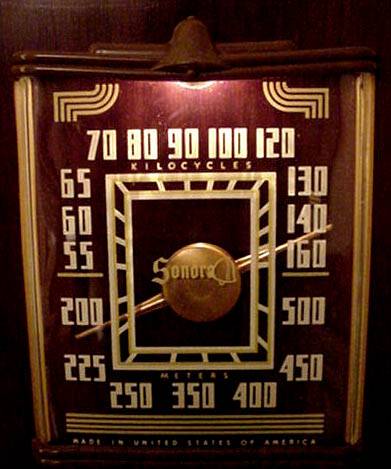
And here is a closer look at what the Dial Scale and frame looked like:
Here is a look inside of the radio that I have:
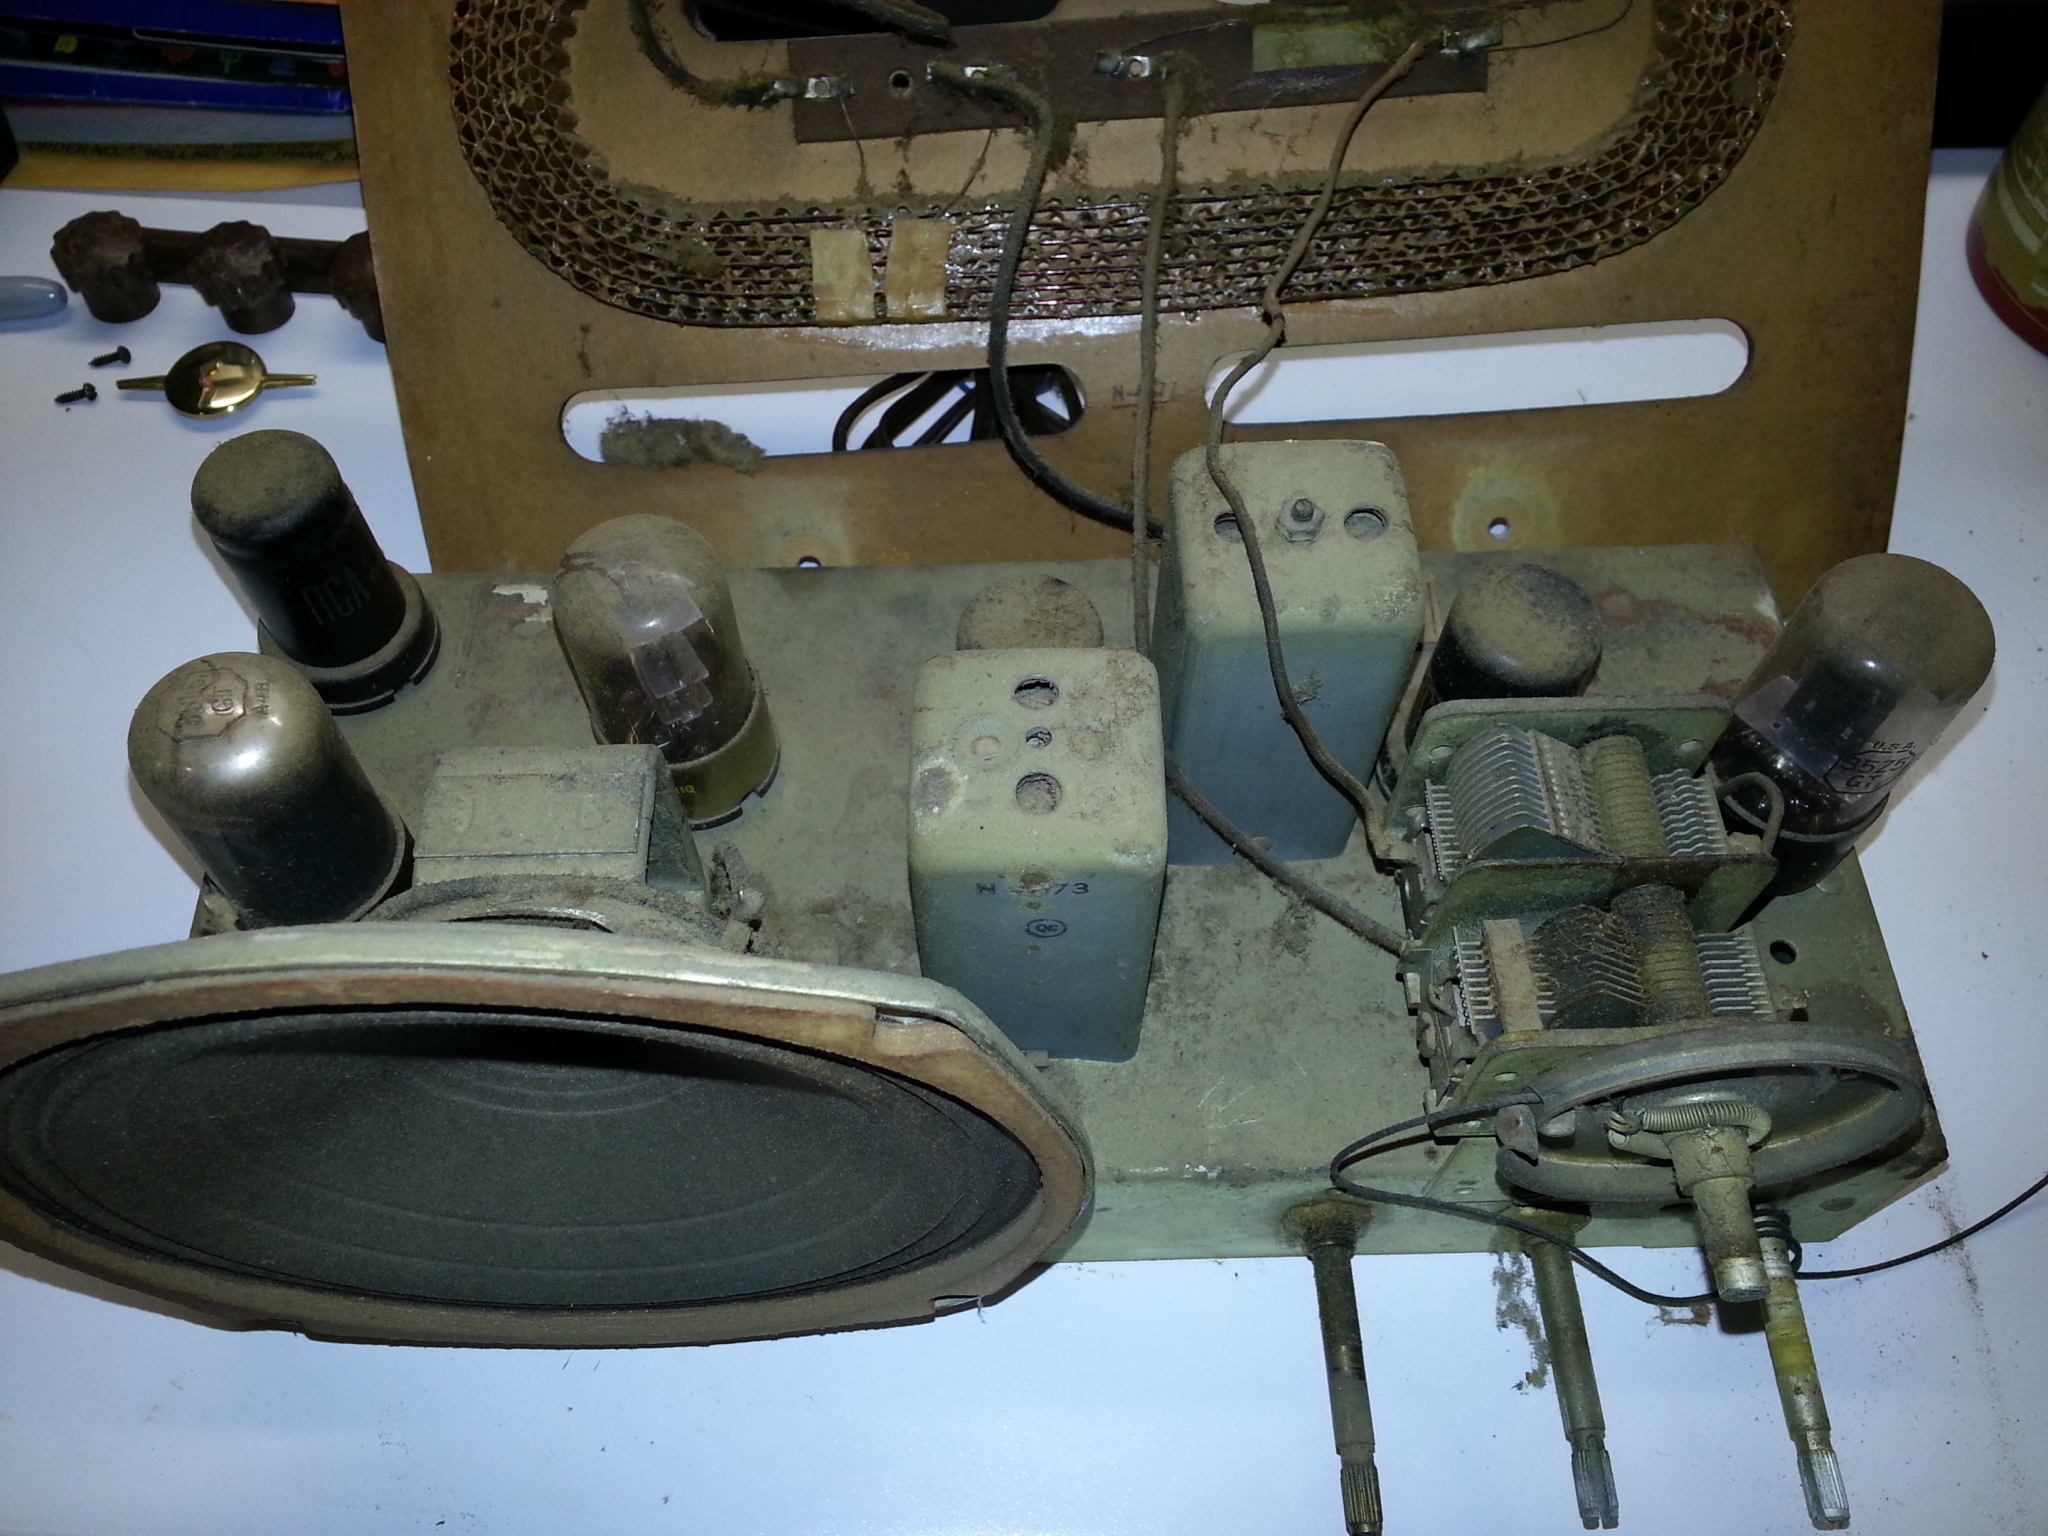
From the front:
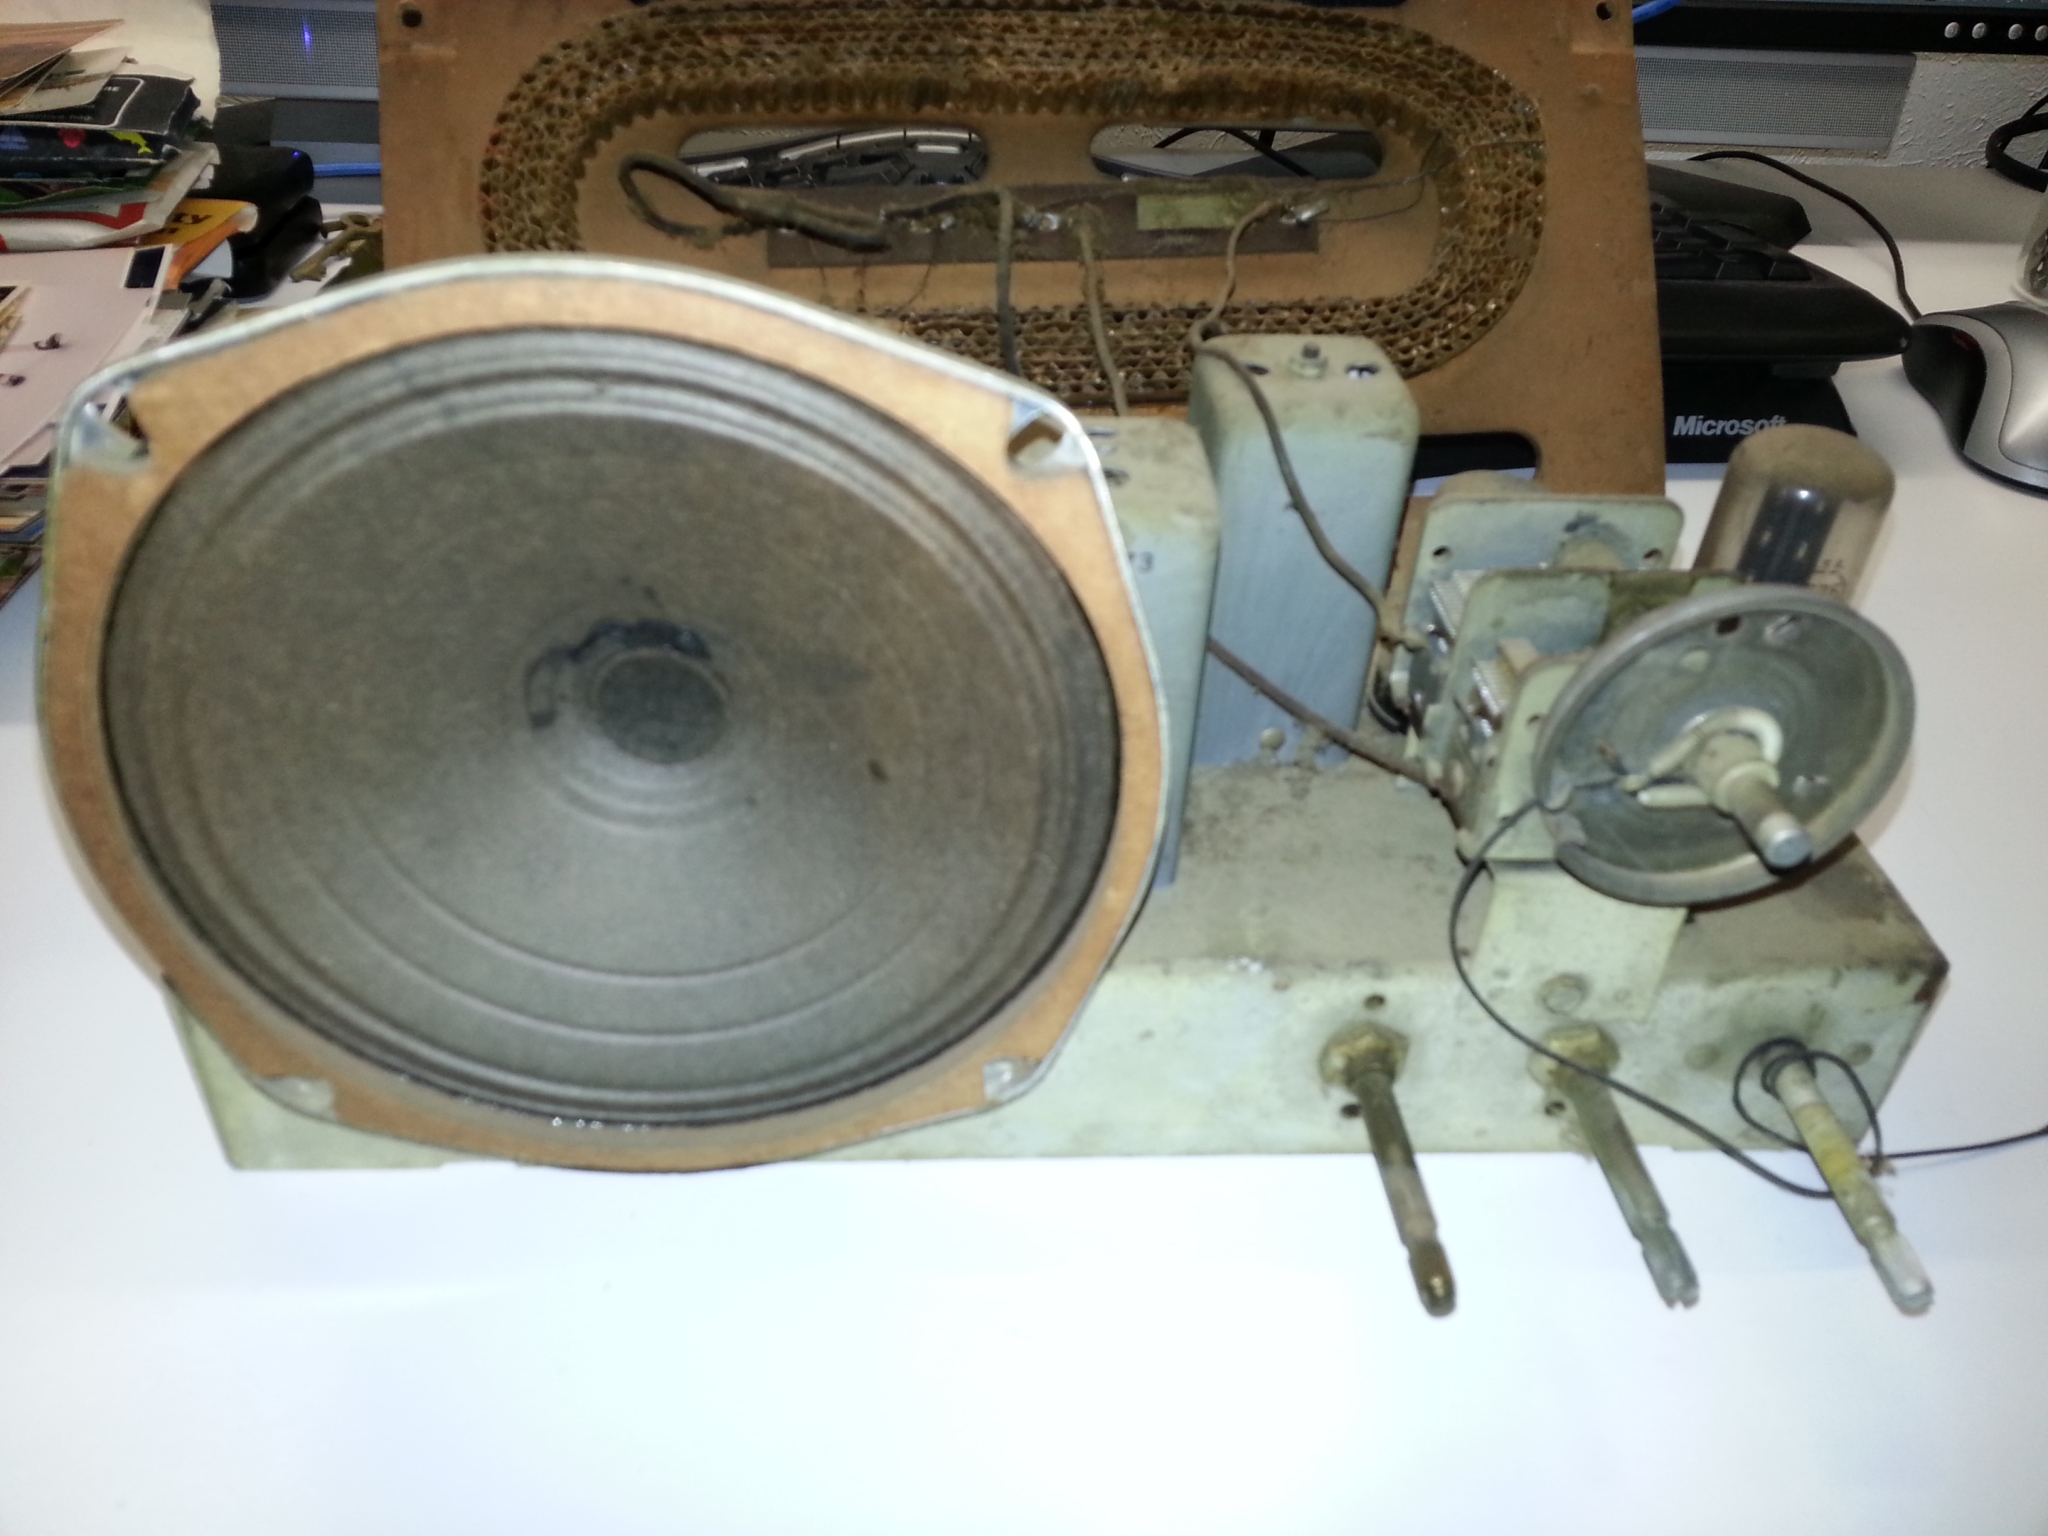
And a look under the chassis as well:

Forward to Page 04
Back to Page 02
Back to the Table of Contents

Leave a Reply
You must be logged in to post a comment.